Spring Boot Starter: Comfortable modularization and abstraction
This is the english version of an article about writing custom Spring Boot starters I’ve written for upcoming german JavaAktuell magazine. iJUG and DOAG members will get it for free.
This post has been featured on This Week in Spring – May 04, 2016.
Abstract
Even in the light of microservices good architecture and well thought modularization is vital for all kinds of application. A microservice without inner structure is as bad maintainable as an old-fashioned monolith, maybe even worse. Candidates for external modules that are intrinsic parts of many microservices without being one of their own could be:
- Datastructures (entities) and corresponding data access objects or repositories for recurrent, structured information
- Logging, status (healthchecks) and similar, cross-cutting or other non-functional requirements, which are paramount to manage the growing number of services
- Integrations (for databases, caches and many others)
Those modules must not only be provided but also be configured, but often this configuration can be an opinionated configuration using sensible defaults which reduces manual configuration in many cases by magnitudes.
In this article i will show you how to create custom "Starters" for Spring Boot based applications that provide opinionated configuration, custom functionality and more.
Spring Boot
Spring Boot can be seen as an umbrella project for the Spring eco-system that has been created with the following goals in mind:
- To provide a radically faster and widely accessible ‘getting started’ experience for all Spring development
- To be opinionated out of the box, but get out of the way quickly as requirements start to diverge from the defaults
- To provide a range of non-functional features that are common to large classes of projects (e.g. embedded servers, security, metrics, health checks, externalized configuration)
Spring Boot does not generate code during bootstrapping or during runtime and there is absolutely no requirement for XML configuration. All tools that are used by Spring Boot to detect available libraries, environment and configuration are available outside Spring Boot for the creation of custom configuration classes or whole "Starters".
The use case: Manage your JavaScript dependencies with Maven, Webjars und wro4j
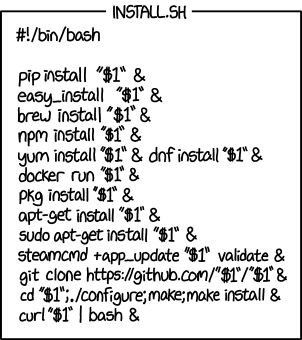
Rumor has it, that there's still a need for server-side generated HTML code, JavaScript as progressive enhancement und simple management of JavaScript dependencies without the the need to use the "Universal install script", even in 2016:
We all have been cursed about Maven, but fact is: It works most of the time unobtrusive and it is also pretty good in managing dependencies, resolve them and find conflicting versions (for example using the enforcer-plugin).
WebJars is a project by James Ward and facilitates the explicit and easy management of the client-side dependencies in JVM-based web applications through Maven, SBT, Gradle, ivy or other build tools. Spring Boot supports WebJars out of the box and dependencies can be used like this:
<link rel='stylesheet' href='/webjars/bootstrap/3.1.0/css/bootstrap.min.css'>wro4j is a tool for analyzing and optimizing web resources that combines many modern tools from frontend development.
The goal is to express frontend dependencies inside the pom.xml:
<properties> <jquery.version>1.11.3</jquery.version> <angularjs.version>1.2.29</angularjs.version> </properties> <!-- ... --> <dependencies> <dependency> <groupId>org.webjars</groupId> <artifactId>jquery</artifactId> <version>${jquery.version}</version> </dependency> <dependency> <groupId>org.webjars</groupId> <artifactId>angularjs</artifactId> <version>${angularjs.version}</version> </dependency> </dependencies> |
and to combine those dependencies into logical modules. The following example shows a library group that is combined with custom JavaScript code into one module:
<groups xmlns="http://www.isdc.ro/wro"> <group name="lib"> <js minimize="false">/webjars/jquery/@jquery.version@/jquery.min.js</js> <js minimize="false">/webjars/angularjs/@angularjs.version@/angular.min.js</js> <js minimize="false">/webjars/angularjs/@angularjs.version@/angular-route.min.js</js> </group> <group name="biking2"> <group-ref>lib</group-ref> <css>/css/stylesheet.css</css> <js>/js/app.js</js> <js>/js/controllers.js</js> <js>/js/directives.js</js> </group> </group> |
We're using the Xml configuration of Wro4j but there's also a nice Groovy DSL available.
This necessary configuration of what is to be used combined with the starter should be enough to include jQuery, AngularJS and custom functionality through one single HTML element.
Spring Boot Starter
A Spring Boot starter consists of two components:
- One
autoconfiguremodule containing the automatic configuration including it's default values. - The
startermodule itself, providing the dependency to theautoconfiguremodule and all needed additional dependencies
Including the starter as a dependency for a Spring Boot application should be enough to start using that library. If a separation of those two isn't needed, combine everything into the starter module.
Not a kind of magic: Conditions
Pivotals Spring Developer Advocate Josh Long explicitly opposes calling auto configuration inside Spring Boot applications "magic" and he is right saying so.
The environments automatic configuration is based on two core components:
- Profiles (
@Profile, available since Spring 3.1) and - Conditions (
@Conditionaltogether withorg.springframework.context.annotation.Condition, available since Spring 4)
Profiles allow provisioning of Beans based on active profiles (spring.profiles.active), whereas conditions can be used to model simple to complex conditions under which Beans are instantiated and configured:
@Conditionalfrom the core framework allows with a custom implementation of aConditionarbitrary statements
Spring Boot contains several useful implementations
@ConditionalOnBean/@ConditionalOnMissingBean: Configuration and beans are only instantiated and used when certain other Beans are available or missing@ConditionalOnClass/@ConditionalOnMissingClass: Configuration and beans are only instantiated and used when certain classes are available to the classloader@ConditionalOnResourceis triggered only when specific resources are available@ConditionalOnProperty: A really powerful condition that matches concrete properties inside configurational files
As much the automatic configuration of Spring Boot applications and their adaption to environment seems magical, it doesn't fit Clarke's third law. It's all there to see and use. Spring Boot even provides a ConditionEvaluationReport, that allows exactly to understand, why a configuration in a given order took place.
And by the way: Spring uses it's own features: The @Profile annotation has been rewritten for Spring 4 and is based on Conditions itself.
Example: Providing the Wro4j Servlet filter
Wro4js core is basically the Servlet filter mapped to an URL pattern which processes the requests for CSS and JavaScript files configured in wro.xml or wro.groovy. This filter should be added the the servlet registration without manual interaction by just adding the wro4j-spring-boot-starter dependency:
@Configuration @ConditionalOnClass(WroFilter.class) @ConditionalOnMissingBean(WroFilter.class) @EnableConfigurationProperties(Wro4jProperties.class) @AutoConfigureAfter(CacheAutoConfiguration.class) public class Wro4jAutoConfiguration { } @ConfigurationProperties("wro4j") public class Wro4jProperties { } |
Wro4jAutoConfiguration is a common Spring @Configuration class (classes which use programmatically instantiate, configure and provide Beans). The configuration – all methods annotated with @Bean among others – should only be done if the WroFilter class is available and there isn't a bean of that type yet. Configuration should be done after the automatic cache configuration as this will be used later. This class also provides properties starting with "wro4j.*" inside an object, in an instance of Wro4jProperties.
There's a caveat here: Often you create configuration for a possible starter inside the project that's using the starter first. That works fine (as by default all @Configuration classes under the base package are evaluated) until the classes building that starter are extracted from the project and you forget to add a META-INF/spring.factories. This file is very similar to the Java "Service Provider Interfaces" and contains the list of classes that should take part in autoconfiguration:
org.springframework.boot.autoconfigure.EnableAutoConfiguration = ac.simons.spring.boot.wro4j.Wro4jAutoConfigurationWith this file Spring Boot neither doesn't have to scan the whole classpath for starter nor the user must take additional steps besides adding the starter itself.
Back to the example. The Servlet filter is a regular Spring Bean and is created like this inside Wro4jAutoConfiguration:
@Bean ConfigurableWroFilter wroFilter(WroManagerFactory wroManagerFactory, Wro4jProperties wro4jProperties) { ConfigurableWroFilter wroFilter = new ConfigurableWroFilter(); wroFilter.setProperties(wroFilterProperties(wro4jProperties)); wroFilter.setWroManagerFactory(wroManagerFactory); return wroFilter; } |
As you can see: The filter depends on a WroManagerFactory and other properties which are injected as usual into this method.
This example shows how powerful the code based configuration of Spring Beans is: Complex conditions and configuration are right their in the source and can be understood, debugged and more, with or without tooling support by IDEs.
Example: Different environment
Wro4j supports caching of optimized resources through a simple, memory-based Least Recently Used strategy. The strategy is an interface and an implementation of a new CacheStrategy using the built-in org.springframework.cache.CacheManager is easily done. To make it work there must be an instance of Springs CacheManager. To get one, use @EnableCaching for example. As Spring supports several caches, ehcache, Redis and others, you get either get a manager backed by either one of those.
Otherwise, if there's no cache manager, the starter should use the basic Wro4j strategy that certainly doesn't make use of any Spring features:
@Bean @ConditionalOnBean(CacheManager.class) @ConditionalOnProperty("wro4j.cacheName") @ConditionalOnMissingBean(CacheStrategy.class) @Order(-100) <K, V> CacheStrategy<K, V> springCacheStrategy(CacheManager cacheManager, Wro4jProperties wro4jProperties) { return new SpringCacheStrategy<K, V>(cacheManager, wro4jProperties.getCacheName()); } @Bean @ConditionalOnMissingBean(CacheStrategy.class) @Order(-90) <K, V> CacheStrategy<K, V> defaultCacheStrategy() { return new LruMemoryCacheStrategy<K, V>(); } |
The springCacheStrategy method is only executed if a CacheManager is active, the name for the actual cache is configured and there isn't a cache strategy already defined. By using an additional @Order annotation its ensured that this method is evaluated before defaultCacheStrategy, which instantiates the default Wro4j strategy.
There are certainly people who would add this exampel to @Annotatiomania™ in no time, but I think using this combination of annotations and code for conditions and configuration apart from business logic and objects is an appropriate and actually readable way.
Deployment
The example project is a standard Maven project, combining a shared autoconfigure and starter module. As such, it bundles the implementation of autoconfiguration as well as the dependencies to Wroj4:
<dependencies> <dependency> <groupId>org.springframework.boot</groupId> <artifactId>spring-boot-starter</artifactId> </dependency> <dependency> <groupId>ro.isdc.wro4j</groupId> <artifactId>wro4j-core</artifactId> <version>${wro4j.version}</version> </dependency> <dependency> <groupId>org.springframework.boot</groupId> <artifactId>spring-boot-starter-test</artifactId> <scope>test</scope> </dependency> </dependencies> |
The dependencies of the autoconfigure module are usually marked as optional and only finalized in the starter module when creating two separate projects.
There's one peculiarity of the starter presented here: It's a child artifact of the official spring-boot-starters parent project. I thought it would be a nice training for clean code and good coding guidelines learning from the settings the Spring team uses. But, as i heard, they only want to inflict them on themselves. What made my life easier was my preferred IDE, which supports Checkstyle, JaCoCo and others out of the box.
The project is available on GitHub.
Conclusion
The starter described here is in production in several projects in our company as well as in public, for example at the Euregio JUG. It saved us from manually managing dependencies and copy and pasting recurring configuration.
There are few alternatives to Spring Boot Starters when developing shared modules for Spring Boot based applications. You could use annotation based configuration for them (@Service and the like) but than you'd have to trigger classpath scanning on a broader level. Manually writing additional XML or Java based configuration seems tedious and may lead to errors.
There are many useful starters listed in the spring-boot-starters-repository: Be it database integration, support for various template engines or even remote shells.
The goal of providing a starter for Wro4j was reached. You have to add the starter and a wro.xml like above containing Maven placeholders like @jquery.version@, which are also used for the WebJar dependencies and processed by the Maven resource plugin:
<resources> <resource> <directory>src/main/resources</directory> <filtering>true</filtering> <includes> <include>wro.xml</include> </includes> </resource> </resources> |
You are free to configure the Wro4j processors and url inside application.properties:
wro4j.filterUrl = /owr
wro4j.managerFactory.preProcessors = removeSourceMaps, cssUrlRewriting, cssImport, cssMinJawr, semicolonAppender, jsMin
wro4j.cacheName = wro4j
and as a result you'll get minimized CSS and JavaScript resources that can be included with a single statement in your HTML pages.
Outlook
The starter here can be extended by creating custom Thymeleaf elements that either render one single HTML element or links to the original resources so that they can be easily debugged. The approach would be the same: Check if Thymeleaf is on the path, register additional tags and so on.